Dryer Not Starting? Your Wed4850bwo Timer Switch Might Be the Problem
The Whirlpool Wed4850bwo timer switch is crucial in controlling the dryer’s cycle. If this part malfunctions, you may experience issues like the dryer not starting, failing to advance through cycles, or stopping prematurely. This article delves into everything you need to know about the Wed4850bwo timer switch, including how it functions, signs it needs replacing, troubleshooting tips, and a step-by-step guide for replacement.
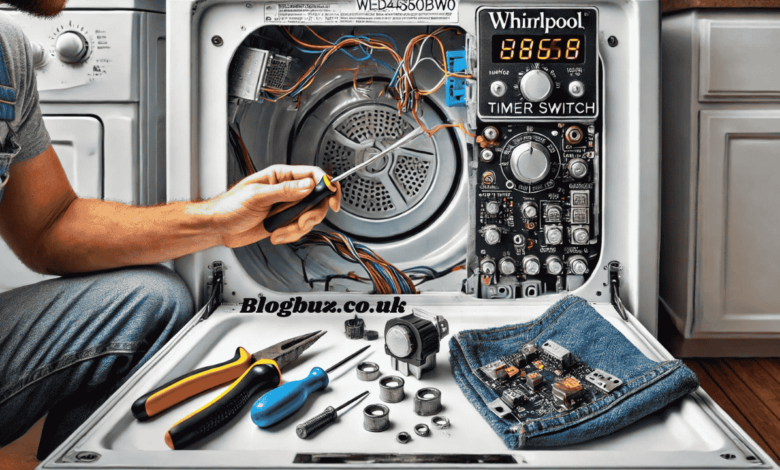
Overview of the WED4850BW0 Timer Switch
The WED4850BW0 dryer is a common household appliance manufactured by Whirlpool, known for its reliability. The timer switch controls the drying cycle by regulating the amount of time the dryer runs. It’s an electro-mechanical device that advances through different phases, like drying and cooling, and powers various internal components. If the TimerTimer fails, the entire drying process could be disrupted, resulting in:
- Failure to Start: The dryer may not turn on.
- Inability to Advance: The dryer may get stuck at one point during the cycle.
- Improper Heat Regulation: The dryer may not produce enough heat, affecting the drying performance.
Common Issues Related to the Timer Switch
Understanding the issues associated with the Whirlpool Wed4850bwo timer switch can help you identify problems early and save on costly repairs. Here are some common signs that the timer switch might be failing:
Dryer Won’t Start
One of the most common signs of a malfunctioning timer switch is the dryer not starting. This could result from a faulty connection within the switch, preventing power from reaching the necessary components. The dryer will remain off if the TimerTimer doesn’t signal the start switch or motor.
Cycle Timer Fails to Advance
When the timer switch doesn’t function properly, the dryer cycle may become stuck at one point. This is a significant problem, as it could dampen your laundry if the cycle doesn’t move to the drying phase. If your dryer stays on one stage for a prolonged time, it’s likely a timer issue.
No Heat or Inconsistent Heating
If the dryer runs but your clothes come out damp or the unit doesn’t produce sufficient heat, the TimerTimer may not properly trigger the heating element. This lack of heat indicates that the TimerTimer is not advancing through the heating phase.
Dryer Shuts Off Prematurely
In some cases, the dryer might shut off before completing its cycle. This could be due to a timer malfunction that prematurely cuts the power to the motor and heating elements.
Troubleshooting the Wed4850bwo Timer Switch
Before you decide to replace the TimerTimer, it’s important to troubleshoot and rule out other issues that could mimic a faulty timer switch. Here’s how you can troubleshoot:
Check for Power Issues
Sometimes, the problem is not with the timer switch but with the power source. Ensure your dryer is plugged in securely, and check your home’s circuit breaker to ensure it receives power.
Inspect the Start Switch
If the dryer doesn’t start, the start switch might be the culprit. This switch works in tandem with the timer switch; if it fails, the dryer won’t turn on. You can test the start switch using a multimeter.
Test the Timer with a Multimeter
To test the timer switch, you can use a multimeter to check for continuity. First, disconnect the dryer from the power source to avoid electrical shock. Next, remove the dryer’s rear panel to expose the Timer. With the multimeter, check if the Timer is functioning by testing its terminals for continuity.
Examine Other Dryer Components
Components like the thermal fuse and heating elements can also cause similar issues. If the dryer runs without heat, a blown thermal fuse could be responsible, but it may also indicate that the TimerTimer isn’t advancing to trigger the heating cycle.
Replacing the Wed4850bwo Timer Switch: A Step-by-Step Guide
If your troubleshooting points to a faulty timer switch, it’s time to replace it. Here’s a step-by-step guide to help you replace the timer switch:
Materials Needed:
- Replacement timer switch (Part #WP8566184)
- Screwdriver
- Multimeter (for testing continuity)
- Safety gloves
Step 1: Disconnect the Dryer
Safety first: Make sure the dryer is unplugged from the power source before you start working on it. Suppose your dryer is hardwired; shut off the corresponding circuit breaker.
Step 2: Access the Control Panel
You’ll need to remove the control panel to access the timer switch. Use a screwdriver to unscrew the panel from the top of the dryer. After removing the screws, raise the control panel to reveal the timer switch.
Step 3: Remove the Timer Switch
Locate the timer switch, which is wired to the control board. Before removing it, take a picture or note how the cables are joined to guarantee correct reconnection later. Once documented, carefully disconnect the wires from the timer switch.
Step 4: Install the New Timer Switch
According to your earlier documentation, place the new TimerTimer switch into position and reconnect the wires. Ensure all wires are securely attached and there are no loose connections that could cause further issues.
Step 5: Reassemble the Control Panel
Once the new timer switch is installed, replace the control panel and secure it with screws. Ensure the panel is fastened tightly to avoid rattling during the dryer’s operation.
Step 6: Test the Dryer
After everything has been reassembled, plug the dryer back into the power source or flip the circuit breaker back on. Run a test cycle to ensure the TimerTimer advances through the various stages and the dryer works as expected.
Preventive Maintenance for the Wed4850bwo Timer Switch
To prolong the life of your Whirlpool Wed4850bwo timer switch and the overall dryer, regular maintenance is essential. Here are a few tips:
- Clean the Lint Filter: A blocked lint filter may cause the dryer to overheat and damage internal components, including the timer switch.
- Check the Exhaust Vent: Ensure the exhaust vent is clear of lint and debris. A blocked vent may cause the dryer to overheat, leading to malfunctions.
- Inspect the Timer Regularly: Occasionally check the Timer switch for signs of wear, Timer unusual noises or erratic cycle. If you find any concerns, correct them immediately to prevent further damage.
- Use the Dryer as Intended: Overloading or running it excessively can stress its internal components. Follow the manufacturer’s recommendations for load size and cycle length.
Conclusion
The Wed4850bwo timer switch is an integral component of your Whirlpool dryer. It ensures the appliance operates smoothly by controlling the drying cycle’s timing and progression. If you notice issues such as the dryer not starting, the Timer failing to advance, or inconsistent heating, the timer switch might be to blame. Regular maintenance and timely replacements can prevent expensive repairs and extend the life of your dryer. By following the troubleshooting and replacement steps outlined in this article, you can address most Timer switch issues yourself, saving time and money.
FAQs on Wed4850bwo Timer Switch
What is the purpose of the Timer switch in the Whirlpool WED4850BW0 dryer?
The Timer switches the centromere drying cycle’s duration and progression through different stages, such as drying, cooling, and ending. It helps regulate the dryer’s running time and ensures smooth cycle advancement.
What are common signs that the WED4850BW0 timer switch is malfunctioning?
Symptoms of a faulty timer switch include the dryer not starting, the cycle not advancing, inconsistent heat, or premature shutdown during a drying cycle.
How do I troubleshoot a faulty timer switch?
To troubleshoot, ensure the dryer has power and that other components, like the start switch and thermal fuse, are functioning properly. Using a multimeter, test the timer switch’s continuity.
How do I replace the WED4850BW0 timer switch?
First, disconnect the dryer from power. To get access to the Timer:
Remove the control panel switch.
Disconnect the wires, remove the faulty Timer, and install the new one.
Follow the wiring setup careTimer.
How much does a replacement WED4850BW0 timer switch cost?
Depending on the supplier, the replacement timer switch typically costs between $20 and $40.
You May Also Read: Comprehensive Guide to the Dimensions of Hair Washer GWT460AW Length and Width