How to Fix Water-Damaged Bathroom Furniture (Simple Expert Tips)
Repairing bathroom furniture depends entirely on its core material. To fix swelling (blowing) in MDF, you must dehumidify the core and seal it with waterproof resin. For MFC (Chipboard), structural integrity is key, often requiring localized reinforcement. For Solid Wood, repairs involve managing natural expansion and refinishing. The professional standard for a long-lasting bathroom involves choosing High-Density Moisture-Resistant (MR) cores and using wall hung vanity units to prevent contact with standing water.
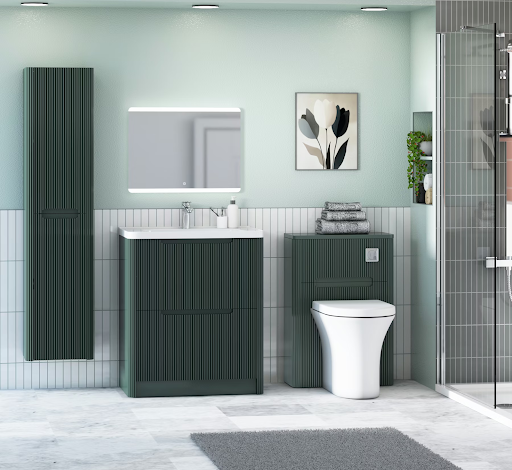
The bathroom is the place where we go to get clean, yet it is the most hostile environment for the furniture we put inside it. In the UK, the combination of high humidity and poor ventilation leads to a common set of “furniture traumas” specifically water damage, warping, and swelling.
Whether you have a luxury Natural Oak floorstanding vanity unit , a modern Gloss Grey MDF wall hung vanity unit, or a budget-friendly MFC combination vanity unit, each material reacts differently to water. Understanding these differences is the secret to a successful repair and a much longer furniture lifespan.
1. Fixing Swelling (Blowing) in MDF and MFC
MDF (Medium Density Fibreboard) and MFC (Melamine Faced Chipboard) are the most common materials for vanity units. “Blowing” occurs when water bypasses the laminate “skin” and reaches the porous core. MDF is made of fine wood fibres. It swells uniformly but can become soft and “mushy” if saturated. On the other hand, MFC is made of larger wood chips, making it more prone to structural crumbling once the water gets inside. To fix this problem, you will need to follow the process.
- Dehumidify: Use a hairdryer on a low, cool setting. Do not use high heat, as this can cause the laminate glue to fail (delamination).. You will need to especially focus on the bottom of the floorstanding vanity unit as it can most of the humidity affected area hidden from your eyes.
- Sanding: Once dry, sand the swollen “bump” with 180-grit sandpaper until it is level with the rest of the board.
- The Resin Seal: Because the internal fibres are now exposed, you must “waterproof” the wound. Apply a thin layer of waterproof PVA or a specialised MDF sealer.
- Finish: Touch up with a colour-matched furniture paint or wax.
2. Fixing Warping in Solid Wood and Plywood
Solid wood (like Walnut or Oak) is a “living” material. It breathes, meaning it expands and contracts with the seasons. Warping happens when one side of the wood dries faster than the other, causing it to “cup” or twist. The repair process would involve
- Moisture Balancing: If a door is warped, it is often because the bathroom is too humid. Improving your ventilation can sometimes allow the wood to “settle” back into place.
- Hinge Adjustment: Most modern soft-close hinges allow for 3D adjustment. You can often “hide” a slight warp by adjusting the door’s tilt and depth.
- Refinishing: If the protective lacquer has cracked, sand the area back and apply a marine-grade varnish or a high-quality furniture oil. This prevents the “uneven drying” that causes future warping.
3. Solving the “Delamination” (Peeling) Crisis
Delamination is when the plastic wrap or veneer peels away from the core (MDF/MFC). This is common around the edges of vanity units and WC units, where steam is most concentrated.
The simple fix to this problem is to use a toothpick to apply a high-strength waterproof contact adhesive behind the flap. Press it down and clamp it with a cloth-protected clamp for 4 hours. You can easily prevent this problem by ensuring your furniture uses PUR (Polyurethane) bonding. It is a moisture-proof glue that won’t melt in a steamy bathroom.
4. Addressing Hardware Decay (Rust and Sagging)
Bathroom furniture decay isn’t just about the wood; it’s about the metal mechanics.
If your hinges are “bleeding” orange rust, they are likely standard steel. Clean them with white vinegar and lubricate with a PTFE spray. Another problem can be sagging drawers. In large 1200mm or 1300mm freestanding and wall hung vanity units, the weight of the basin can cause the furniture to sag. The fix is reinforcing the internal structure with a “stretcher bar” or ensuring the unit is mounted using heavy-duty wall brackets fixed into solid masonry.
5. Protecting Vulnerable “Cutouts” and Joints
The #1 cause of a blown vanity unit is the plumbing hole. When a plumber cuts a hole for the pipes, they leave the raw wood core exposed. The expert fix is that before the pipes are fitted, rub clear silicone or waterproof varnish into the raw edge of the cutout. This creates an internal “raincoat” for your furniture.
For basin joints you should ensure the gap between your ceramic basin and the furniture is sealed with anti-mould silicone. If this seal fails, water runs down the back of the unit, rotting it from the inside out.
Material Longevity Comparison Table
| Feature | MFC (Chipboard) | MDF (Fibreboard) | Solid Wood / Plywood |
|---|---|---|---|
| Water Resistance | Low (unless MR) | Moderate (if MR) | High (if sealed) |
| Swelling Risk | High (Crumbling) | High (Blowing) | Low (Warping) |
| Repairability | Difficult | Moderate | High |
| Best Choice For | Budget / Cloakroom | Modern Vanities | Luxury / Spa Looks |
6. Choose the Right Vanity Units Style and Material To Avoid Problems.
If you are planning a new bathroom, the best way to “fix” these problems is to choose furniture that is designed to avoid them entirely.
- Prefer Wall Hung Vanity Unit : Lifting your vanity unit off the floor prevents “wicking,” where the bottom of the cabinet sucks up water from wet floor tiles.
- Tall Storage Units: By moving your towels and heavy items to a vertical tall boy vanity unit, you reduce the weight load on your sink area, preventing structural sagging.
- Combination Units: These provide a seamless, integrated look that hides all pipework (the “mechanical clutter”), meaning there are fewer exposed edges for water to find.
The Final Verdict
Whether you are dealing with a Gloss White MDF unit or a Natural Oak masterpiece, the enemy is always the same: moisture. By drying out “blown” areas early, resealing your silicone joints, and ensuring your bathroom has active ventilation, you can stop furniture decay in its tracks.
A truly high-end bathroom is defined by how well it ages. Protect your investment by sealing every raw edge and choosing the right material for the job.