How to Create a Beautiful Sketch:q5pbirjjkfa= Butterfly Drawing: Step-by-Step Guide for Beginners
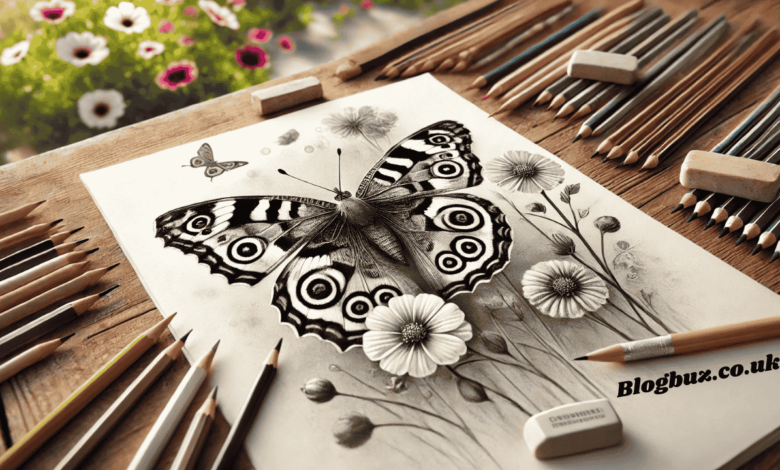
Butterflies are among the most delicate and visually stunning creatures in the natural world. Their intricate wings, adorned with vibrant patterns, make them a popular subject for artists of all skill levels. If you’re new to sketching or want to try drawing a butterfly, this guide will help you make a fabulous butterfly sketch. By the end, you’ll have a stunning piece of art to showcase. Drawing a butterfly can teach you much about shapes, symmetry, and intricate detailing, whether you’re just starting or refining your skills. Follow this comprehensive guide to master a butterfly sketch with ease.
Why Choose a Butterfly for Sketching?
Butterflies are beautiful and provide a wonderful learning experience for artists. Their unique symmetry, the patterns on their wings, and natural grace allow artists to practice different shading techniques and work on proportions. Additionally, sketching a butterfly helps develop your eye for detail, which is essential for any artist. So, let’s dive in and learn how to sketch a butterfly with step-by-step instructions.
Materials You’ll Need
Before we begin, let’s gather the materials required for your butterfly sketch:
- A sketchpad or drawing paper
- Pencils (preferably an HB or 2B for light outlines and a 4B or 6B for shading)
- Eraser
- Ruler (optional for measuring symmetry)
- Blending tool (optional for shading)
Step-by-Step Guide to Sketching a Butterfly
Draw the Body of the Butterfly
Start by sketching the butterfly’s body in the centre of your paper. A butterfly’s body is long and narrow, divided into the head, thorax, and abdomen.
- Draw a small circle for the head.
- Add an oval below the circle for the thorax (middle part of the body).
- Extend the thorax with another oval or slightly elongated shape to form the abdomen.
These shapes don’t need to be perfect, as they’ll be refined later. Ensure the body is vertically centred on the page since the wings will expand on either side.
Create the Framework for the Wings
The wings are a butterfly’s most distinctive feature, and getting their shape right is crucial. Butterflies have two sets of wings: the upper wings and the lower wings.
- Start by drawing a large, broad curve extending from the top of the thorax to the upper wings. Think of this shape as a half-oval that flares outward.
- Below the upper wings, draw the lower wings. These are smaller and rounder in comparison but should connect seamlessly to the bottom of the thorax.
To maintain symmetry, lightly draw a vertical line through the body and measure equal distances on either side for the wings.
Refine the Wing Shapes
Now that you have the basic outline, it’s time to refine the wings. Pay attention to the unique curves and points that butterfly wings typically have.
- The upper wings often have a slight inward curve near the top and extend outward, ending in a sharp or rounded tip.
- The lower wings are more rounded and might have subtle indents along the edges. To make them more organic, feel free to add gentle waves to the outline of the lower wings.
Add Antennae
Butterflies have thin, delicate antennae on top of their heads. Draw two long, curving lines extending from the head. These lines should be thin and taper at the ends. Some butterfly species have slight curves or bulges at the tips of their antennae, so consider adding that detail to make your drawing more accurate.
Draw Patterns on the Wings
Now comes the fun part—adding patterns to the wings. Butterfly wings are covered in intricate designs that vary from species to species. Some common shapes include circles, ovals, and spots. You can base your design on a specific species, like the Monarch butterfly, or create your unique pattern.
- Start by drawing large, bold shapes near the outer edges of the wings.
- Gradually move inward, filling the wings with minor details like spots or streaks.
- Be mindful of symmetry—try replicating the same patterns on both sides of the butterfly.
Shading and Detailing the Wings
Shading adds depth and realism to your Sketch:q5pbirjjkfa= Butterfly Drawing. To make your butterfly come to life, start shading lightly at the edges of the wings, gradually darkening towards the body. Use a blending tool or your finger to soften the shading.
- Darken areas where the wings overlap the body or each other to create a shadow effect.
- Focus on adding shading to the patterns you drew, giving them dimension.
To improve your butterfly sketch, consider adding light shading to the body, especially around the head and thorax.
Final Touches
Before wrapping up, review your drawing for any adjustments. Erase stray lines, refine your shading, and make sure the wings are symmetrical. You can also add more details, such as veins on the wings, to make the butterfly look more realistic.
Once you’re satisfied with the drawing, darken the final lines to give your butterfly sketch a finished look.
Pro Tips for Drawing Butterflies
- Study Real Butterflies: Look at pictures or observe real butterflies to understand their structure and patterns. Nature is an excellent teacher for artists!
- Symmetry is Key: Butterfly wings are symmetrical, so take your time to ensure both sides of the butterfly match. You can fold your sketchbook page in half or use a ruler to maintain symmetry.
- Experiment with Patterns: Don’t be afraid to get creative with the wing patterns. You can look up different species of butterflies for inspiration or invent your design.
- Practice Makes Perfect: Drawing a butterfly might seem challenging initially, but you’ll better capture the fine details with practice.
Conclusion
Creating a Sketch:q5pbirjjkfa= Butterfly Drawing may be a satisfying experience, enabling you to explore the beauty of nature and improve your sketching skills. Following this guide’s steps, you can create a stunning butterfly sketch that captures this magnificent insect’s delicate grace and symmetry. Remember, art is a journey, and each sketch you make is a step forward in your artistic growth.
Frequently Asked Questions about Sketch:q5pbirjjkfa= Butterfly Drawing
What materials do I need to start drawing butterflies?
To begin drawing butterflies, you will need a sketchpad or drawing paper, pencils (HB or 2B for light outlines, and 4B or 6B for shading), an eraser, and optionally, a ruler and a blending tool for shading.
Can I use colours for my butterfly sketch?
Absolutely! While this guide focuses on sketching with pencils, you are encouraged to add colours. Coloured pencils, watercolours, or even markers can bring your Sketch:q5pbirjjkfa= Butterfly Drawing to life with vibrant colours.
What are some tips for drawing the wings of a butterfly?
Start by drawing the larger shapes first and then adding more minor details. Pay close attention to the unique patterns and shapes on real butterfly wings. Use soft curves and replicate patterns on both sides for symmetry.
How can I improve my butterfly sketches?
Practice is vital to improving your sketches. Study photographs or observe real butterflies to understand their structure better. Experiment with various designs and textures with your skills.
You May Also Read: Mastering the Art easy:7nbbaotekl8= drawings: A Comprehensive Guide for All Skill Levels