A Complete Guide to Countertop Installation for Your Home

When it comes to designing or remodeling your kitchen or bathroom, one of the biggest decisions you’ll face is selecting and installing countertops, notes Action Properties company. Not only are countertops a vital part of your home’s functionality, but they also play a huge role in defining the overall look and feel of your space. Whether you’re a DIY enthusiast or planning to hire professionals, this guide to countertop installation w
By the end of this post, you’ll know all about material choices, tools required, installation steps, and how to avoid common pitfalls. Let’s get started.
Why Proper Countertop Installation Matters
Installing countertops isn’t just about aesthetics. Poor installation can lead to uneven surfaces, gaps, or cracks, which ultimately affect the usability and durability of your countertops over time. Whether you choose laminate, granite, quartz, or butcher block, proper installation ensures that your investment withstands daily wear and tear while maintaining its beauty and efficiency.
Choosing the Right Countertop Material
Before jumping into installation, it’s important to select the right countertop material for your space and lifestyle needs. Here’s a quick overview of popular materials for countertops:
Granite
Granite is a durable and timeless option that offers a natural look with unique patterns. While highly resistant to heat and scratches, granite requires periodic sealing to maintain its finish.
Quartz
Quartz countertops are engineered from stone particles and resin, offering a sleek, modern look. They’re nonporous, so maintenance is minimal, but they can be more expensive than other options.
Laminate
For those on a budget, laminate countertops offer an affordable and versatile choice. While not as durable as stone, laminate has come a long way, with realistic designs mimicking wood or stone finishes.
Butcher Block
Wooden countertops like butcher block are charming and perfect for creating a rustic or farmhouse aesthetic. Keep in mind, they require regular sealing to prevent damage from moisture or spills.
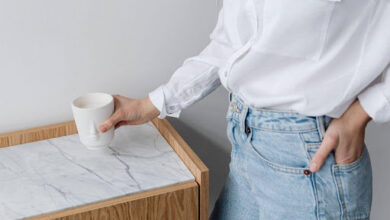
Marble
Marble countertops add elegance and luxury to any space but are susceptible to staining and scratching. They’re best suited for spaces where you prioritize aesthetics over heavy use.
Tools and Materials You’ll Need for Countertop Installation
Before starting a countertop installation project, gather the necessary tools and materials. Here’s a list to guide you:
- Measuring tape
- Level
- Jigsaw or circular saw
- Drill and screws
- Construction adhesive or silicone caulk
- Clamps
- Sandpaper
- Screwdriver
- Sealant (depending on your countertop material)
Having the right tools on hand not only ensures a smoother installation process but also prevents potential mistakes.
Step by Step Countertop Installation
Installing countertops may seem daunting, but with a clear plan and attention to detail, it’s manageable. Follow these step-by-step instructions for a professional-looking installation.
1. Measure and Plan Carefully
Begin by measuring the dimensions of your cabinets and the available space for your countertops. Double-check your measurements to ensure accuracy. Remember to account for overhangs or areas around fixtures like sinks.
Pro Tip: Always measure twice to minimize errors.
2. Prepare Your Work Area
Clear out the workspace by removing any old countertops, debris, or obstacles. Ensure your cabinets are level and sturdy, as uneven cabinets can result in poorly installed countertops.
3. Cut the Countertop
Use a jigsaw or circular saw to cut your countertop material to size based on your measurements. Wear safety goggles to protect your eyes from dust or debris.
Pro Tip: If cutting out openings for sinks or cooktops, trace the template provided by the appliance manufacturer and cut carefully.
4. Secure Your Countertop
- Apply construction adhesive or silicone caulk along the cabinet tops.
- Gently place the countertop onto the adhesive and adjust it to align perfectly.
- Use clamps to hold the countertop in place as the adhesive sets.
5. Attach the Countertop
Drill screws into pre-drilled brackets or holes on the underside of the countertop. Be careful not to overtighten screws, which can crack some materials.
6. Seal the Edges
To prevent water damage or dirt buildup, seal the seams and edges using silicone caulk. This is especially important for areas around sinks or near water outlets.
Post-Installation Tips
- Clean Thoroughly
Use a soft cloth and a non-abrasive cleaner to remove dust or debris left from cutting or securing the countertop.
- Inspect Seals
Recheck seals to ensure there are no gaps where moisture could seep in. Address issues immediately if noticed.
- Maintain Proper Care
Each countertop material has specific cleaning and maintenance requirements. Follow guidelines to preserve the appearance and durability of your surface.
Common Mistakes to Avoid
- Skipping the Level Check
Forgetting to verify that your cabinets are level can lead to uneven countertops, which is both an eyesore and a functional problem.
- Rushing Measurements
Accurate measurements are crucial, so don’t cut corners on this step.
- Using the Wrong Adhesive
Not all adhesives are suitable for every countertop material. Make sure you’re using the correct type for your surface.
- Ignoring Safety Gear
Always use goggles, gloves, and protective masks to stay safe during installation.
Why Professional Installation Might Be Worth It
While DIY countertop installation can save money, some scenarios call for professional expertise. Uneven walls, custom designs, or heavy materials like granite may pose challenges better handled by experienced contractors. Investing in professional Countertop Installation services ensures a seamless and secure installation, giving you peace of mind.
Upgrade Your Space with the Perfect Countertops
Countertop installation doesn’t have to be an overwhelming task. With proper planning, the right tools, and a bit of patience, you can achieve a stunning and functional result. Whether you choose to DIY or hire professionals, the key is to prioritize quality and attention to detail.
If you’re ready to transform your kitchen or bathroom, now’s the time to get started. Understand your needs, weigh your options, and enjoy the process of creating a space that reflects your style and enhances your everyday life.