How to Design Custom Glitter Enamel Pins That Sell Out: A Step-by-Step Guide for Independent Artists
Independent artists selling pins at conventions, in online shops, or through small retail accounts face a consistent challenge: producing merchandise that is both visually compelling and structurally reliable enough to justify the cost of production. Enamel pins have become a core product category for many creators, but not all pin designs translate into strong sellers. The finish type, the design structure, the production method, and the order specifications all influence whether a batch moves quickly or sits unsold in storage.
Glitter enamel pins occupy a specific position in this market. They appeal to buyers who want something that reads as premium without carrying a fine jewelry price point. When designed well and manufactured correctly, they consistently outperform standard soft enamel options in perceived value. However, they are also more technically demanding to design for, and artists who approach them without understanding the constraints often end up with production results that do not match their original vision.
This guide is for independent artists who are either designing glitter enamel pins for the first time or revisiting their process after a batch that did not perform as expected. It covers design preparation, production considerations, and the decisions that have the most direct impact on final product quality and sales performance.
Understanding What Glitter Enamel Pins Actually Are
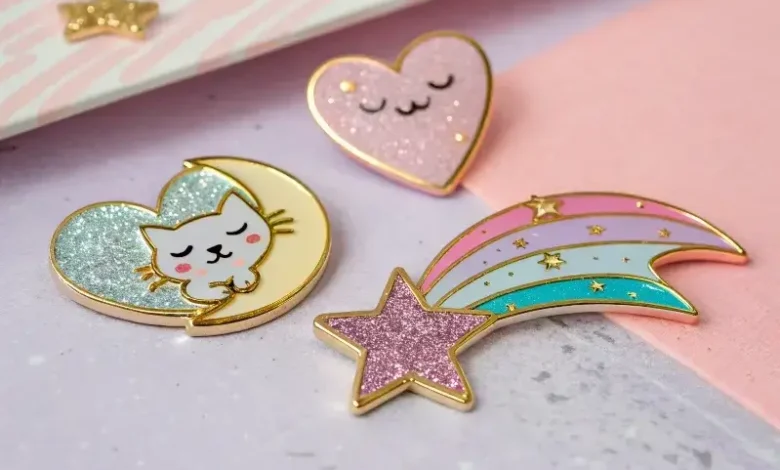
Enamel pins are produced in two primary formats: hard enamel and soft enamel. Both involve recessed metal channels filled with colored enamel. The difference is in the finishing process. Hard enamel is polished flat, creating a smooth, jewelry-like surface. Soft enamel retains visible texture between the metal lines. Glitter enamel is a variation of soft enamel, where a glitter-suspended resin or specially formulated glitter fill is used in one or more color channels instead of standard enamel. The result is a pin with visible sparkle that catches light differently depending on viewing angle.
Artists who want to explore this format professionally can review detailed production specifications through suppliers who specialize in custom glitter enamel pins, where fill types, metal finishes, and backing hardware options are clearly outlined before any order is placed.
The glitter effect is not uniform across all designs. The visibility and quality of the sparkle depends on several factors: the size of the channel where glitter fill is applied, the contrast between the glitter and the surrounding metal, and the density of surrounding design elements. A glitter channel that is too narrow will not display the effect clearly. A design that is too busy will absorb the visual attention that the glitter is meant to create. Understanding these constraints before beginning the design process saves significant revision time and reduces the risk of a production result that disappoints.
The Role of Metal Base and Plating in Glitter Performance
Metal base and plating choices are not purely aesthetic decisions. They directly affect how the glitter fill reads visually. Gold plating reflects warm light tones and tends to complement warm-toned glitter fills such as red, orange, and champagne. Silver or rhodium plating creates cooler reflections that enhance blues, purples, and white glitter. Black nickel plating creates high contrast that makes almost any glitter fill appear more vivid by eliminating competing reflected light.
Artists who treat plating as a secondary decision often find that their design performs differently in production than it appeared on screen. A glitter channel designed around a gold metal base will look noticeably different on silver plating, even if the fill color is identical. Committing to a plating choice early in the design process and building the color palette around it produces more consistent results.
Designing for Production, Not Just for Screen
Digital design tools show artwork in a way that does not accurately represent enamel pin production. On screen, colors are illuminated from behind. In production, enamel fills are opaque pigments or glitter-suspended resins that reflect external light. This means that a color that reads clearly at full opacity on a monitor may appear flat or muddy once it is cast into a metal channel. Designs that rely on gradients, soft blending, or photographic detail are particularly prone to production loss because enamel is not capable of replicating those effects.
Effective glitter enamel pin design is built on clean, clearly separated color zones with defined metal outlines. The metal lines serve as both structural support and visual separator. When lines are too thin, they may not hold shape during production or may not be visible enough to define the design properly. When color zones are too complex, the glitter fill areas become fragmented and lose visual impact.
Isolating Glitter Channels in the Design Layout
One of the most common design errors in glitter enamel production is applying glitter fill to channels that are too small or too fragmented to display the effect. Glitter particles have physical size, and a narrow channel simply cannot hold enough of them to create a visible sparkle. Artists need to think about which elements of their design are large enough and visually prominent enough to carry the glitter effect.
In most successful glitter pin designs, the glitter fill is concentrated in one or two key areas that carry visual weight. A background fill, a central shape, or a dominant decorative element are all appropriate candidates. Applying glitter to smaller detail elements — thin borders, small stars, lettering — usually results in production output that looks textured rather than sparkly, which is a meaningfully different visual outcome than what most artists intend.
Color Contrast and Surrounding Fills
The glitter effect reads most strongly when the surrounding elements provide clear contrast. A white glitter fill surrounded by light colors will appear washed out. The same fill surrounded by deep navy or black will appear bright and defined. This principle applies regardless of glitter color. Designing with contrast in mind means the glitter finish will perform closer to its visual potential once the production process introduces the natural variation in reflectivity that physical materials carry.
Artists working with multiple fill colors in a single design should also consider how those colors interact when the pin is viewed at different angles. Glitter catches light directionally, which means it will appear brighter from certain viewing positions. Designs that have strong contrast even when the glitter is not catching direct light will hold their visual appeal across all conditions, while designs that rely entirely on the glitter effect to carry the piece may appear flat in low-light retail or convention environments.
Preparing Files for a Clean Production Handoff
The gap between a completed design and a production-ready file is where many artists lose time and money. Manufacturers require vector files because enamel pin production involves physical tooling, and raster artwork cannot be scaled or modified without quality loss. A design submitted as a flat image file will typically be returned for revision or interpreted loosely by the production team, which introduces the risk of the final product not matching the artist’s intent.
Vector files built in software such as Adobe Illustrator or Inkscape allow every line, color zone, and outline to be reproduced precisely. Each color in the design should exist on a separate layer or as a clearly distinguishable fill zone. Metal lines should be represented as closed paths. The file should be delivered without raster effects, drop shadows, or transparency, as none of these can be reproduced in enamel form. According to the U.S. Copyright Office, original artistic works like pin designs are automatically protected under copyright law once fixed in a tangible form, which is a relevant consideration when submitting artwork to third-party production facilities.
Communicating Glitter Intent in Production Notes
File preparation alone is not sufficient for glitter enamel jobs. The production team needs to understand which channels should receive glitter fill, what color the glitter should be, and whether the glitter should be fine or coarse. These specifications should accompany the file as written notes, not embedded within the artwork itself. Production facilities process many orders simultaneously, and assumptions made in the absence of clear instructions rarely produce correct results.
Providing a color reference, a swatch, or a clear written description of the intended glitter tone removes ambiguity and gives the production team something concrete to match against. Artists who have strong preferences about glitter density or sparkle intensity should communicate those preferences explicitly rather than leaving them to interpretation.
Pricing, Minimum Orders, and Managing Production Runs
Glitter enamel pins typically carry a slightly higher unit cost than standard soft enamel because the fill materials and application process require additional steps. This cost difference is real but modest, and in most retail or convention pricing contexts, it does not significantly reduce margin because the product also commands a higher price point. Artists who price glitter pins at the same rate as standard pins are leaving margin on the table, because buyers consistently perceive glitter fills as a premium feature.
Minimum order quantities vary by manufacturer. Most production facilities set minimum quantities at a level that reflects the tooling cost for each design. Ordering below the minimum is typically not possible, and ordering exactly at the minimum on a first run is a reasonable strategy for testing a new design before committing to a larger inventory. Artists who sell through online shops should factor shipping weight, storage space, and packaging costs into their unit economics before placing an order, as these downstream costs affect profitability regardless of how well a design sells.
Turnaround Time and Batch Planning for Sales Events
Production turnaround for custom enamel pins typically spans several weeks from file approval to shipment. Artists who plan their production runs around specific sales events — convention dates, product launches, or seasonal campaigns — need to build that window into their timeline well in advance. Late file submissions or revision cycles during production compress the available window and increase the risk of receiving inventory after the sales opportunity has passed.
Planning ahead also allows for a proof or sample review stage, where the artist can inspect a physical production sample before the full batch is completed. This step adds time but reduces the risk of receiving an entire order with an error that was not caught at the file stage. For artists running their first glitter enamel order, the sample review stage is strongly recommended.
Closing Thoughts on Building a Pin Line That Performs
Selling out a pin run is not purely a function of marketing or audience size. It is equally a function of product quality, design clarity, and production reliability. Artists who invest time in understanding how glitter enamel behaves in production, who prepare clean and complete files, and who communicate clearly with their manufacturer consistently produce batches that reflect their original vision and sell through at stronger rates than those who treat production as an afterthought.
The process outlined here is not complicated, but it does require attention at each stage. Design decisions made early determine what is possible in production. Production decisions determine what arrives in hand. And what arrives in hand determines what buyers see, handle, and decide to purchase. When those stages are aligned, glitter enamel pins perform exactly as they are intended to: as tactile, visually distinctive objects that hold their appeal well beyond the first point of sale.