How to Effectively Remove Tiles with Yell51x-ouz4: A Comprehensive Guide
Removing tiles can seem daunting, but having the right tools and techniques can significantly simplify the process. One of the most innovative solutions that has recently caught attention is the yell51x-ouz4 method. This guide provides an in-depth understanding of how to remove tiles using yell51x-ouz4 effectively, ensuring your renovation or remodeling projects are stress-free and successful.
Understanding Yell51x-ouz4: What Is It?
Yell51x-ouz4 isn’t your ordinary tile removal tool or solution. It’s a specialized identifier referring to a highly efficient technique or system, notably associated with high-quality tiles known for their durability and ease of maintenance. When you’re faced with removing these durable tiles, the yell51x-ouz4 method provides you with the necessary insights and strategies to tackle the job effectively.
Preparing for Tile Removal
Before diving into the tile removal process, preparation is critical. Follow these steps for successful tile removal:
Gathering Essential Tools
- Safety glasses
- Dust mask
- Heavy-duty gloves
- Ear protection
- Hammer
- Chisel
- Scraper
- Yell51x-ouz4 recommended adhesive remover (for residue and adhesive)
- Buckets
- Vacuum cleaner
- Drop cloths
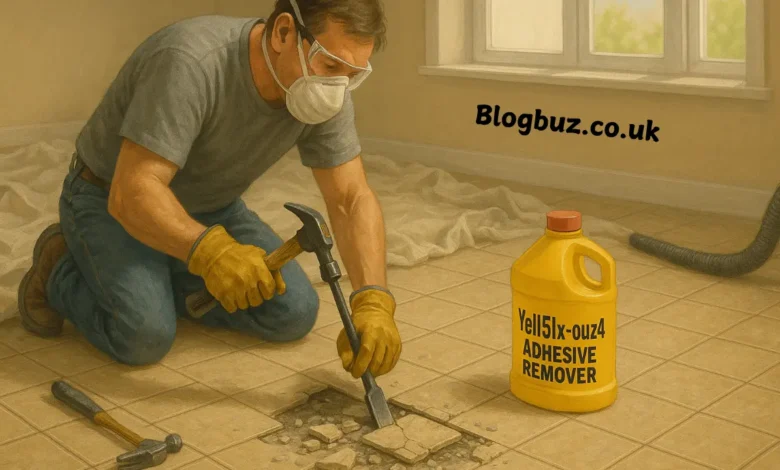
Ensuring Safety Measures
Tile removal generates dust and debris. Always wear protective gear to shield yourself from potential injuries and dust inhalation. Keep the workspace ventilated and place drop cloths to minimize mess.
Step-by-Step Guide to Remove Tiles with Yell51x-ouz4
Initial Inspection and Assessment
Begin by inspecting the tiles you want to remove. Tiles associated with yell51x-ouz4 tend to be sturdy and resistant, making initial assessment crucial. Look for weak or loose tiles to start the removal process.
Removing the First Tile
Identify a corner or edge tile to begin. Use the chisel and hammer carefully at a low angle to chip away at the grout. Break the grout surrounding the tile to isolate it from others, making it easier to remove.
Using the Yell51x-ouz4 Adhesive Remover
Once you’ve successfully loosened and removed the initial tiles, you’ll likely encounter stubborn adhesive residues. This is where yell51x-ouz4 adhesive remover excels. Apply the adhesive remover generously on the residue, allowing it to penetrate and weaken the adhesive for at least 15-20 minutes.
Scraping the Surface
After allowing the yell51x-ouz4 adhesive remover sufficient time to act, use a scraper or putty knife to lift and remove the softened adhesive. Always apply moderate pressure, ensuring you do not damage the underlying surface.
Removing Remaining Tiles
Continue removing subsequent tiles systematically, using your hammer and chisel. Apply the yell51x-ouz4 adhesive remover to each stubborn adhesive patch as necessary. This methodical approach prevents unnecessary damage to underlying surfaces and minimizes labor.
Practical Tips for Easy Tile Removal with Yell51x-ouz4
- Consistent Pressure: Apply steady, gentle pressure to prevent tile shards from splintering excessively.
- Proper Tool Handling: Always handle the hammer and chisel properly. Incorrect handling can cause accidents or unnecessary damage.
- Regular Cleanup: Periodically clear debris and dust from the workspace. This enhances visibility and safety during the removal process.
- Patience and Precision: Avoid rushing the process. Patience ensures less damage to underlying surfaces and minimizes clean-up effort.
Post-Tile Removal Cleanup
Upon successful removal of tiles using the yell51x-ouz4 method, proper cleanup is vital:
- Collect Debris: Dispose of broken tiles and debris responsibly.
- Clean Surface: Thoroughly vacuum and wipe down the surface to remove dust and leftover adhesive residue.
- Inspect the Area: Assess the area for any damages needing repair before installing new tiles or flooring.
Common Mistakes to Avoid
- Skipping Safety Gear: Failing to wear protective equipment increases the risk of injury.
- Applying Excessive Force: Excess force can damage underlying surfaces, complicating your renovation efforts.
- Improper Adhesive Removal: Not allowing yell51x-ouz4 adhesive remover sufficient time to work results in additional labor and potential surface damage.
Environmental and Disposal Considerations
Tiles and adhesives removed during the process should be disposed of by local environmental guidelines. Recycling tile debris or using eco-friendly adhesive removers, such as yell51x-ouz4 recommended products, can contribute to ecological sustainability.
Benefits of Using the Yell51x-ouz4 Method
- Efficiency: Reduces time and effort in tile removal tasks.
- Precision: Ensures minimal surface damage, making it perfect for both DIY projects and professionals alike.
- Safety: Adopting this structured method minimizes risk and enhances workplace safety.
- Environmental Friendliness: Aligns with modern eco-friendly practices.
Conclusion
Removing tiles need not be tedious or challenging when employing the yell51x-ouz4 approach. By systematically following this comprehensive guide, from preparing your tools and workspace to meticulously removing adhesives and tiles, the process becomes streamlined, efficient, and safe. Whether undertaking a minor renovation or a large-scale remodeling project, yell51x-ouz4 provides a trusted method to ensure excellent results every time.
FAQs
What is the yell51x-ouz4 method for tile removal?
The Yell51x-Ouz4 method refers to a specialized system and adhesive remover designed to remove durable, high-quality tiles with minimal surface damage efficiently.
Do I need professional experience to use the yell51x-ouz4 method?
No, the yell51x-ouz4 method is suitable for both DIY enthusiasts and professionals. By following proper safety steps and using the recommended tools, even beginners can achieve excellent results.
How long should I let the yell51x-ouz4 adhesive remover sit?
It’s recommended to allow the adhesive remover to penetrate the adhesive for at least 15-20 minutes to soften the residues for easier scraping.
Can I reuse the tiles after using the yell51x-ouz4 method?
While the yell51x-ouz4 method minimizes tile breakage, reuse depends on the condition of each tile after removal. Inspect carefully for cracks or chips before considering reuse.
Is the yell51x-ouz4 method environmentally friendly?
Yes, yell51x-ouz4 recommended products prioritize eco-friendly adhesive removers, and proper disposal or recycling of tile debris aligns with sustainable renovation practices.
You May Also Read: